
Is your beloved wooden furniture looking a little worse for wear? Perhaps that antique dresser inherited from your grandmother has lost its luster, or your outdoor patio set is showing the effects of harsh weather. Before you resign yourself to replacing these pieces, consider the transformative power of wood refinishing. It's a fantastic way to breathe new life into your furniture, saving you money and preserving cherished items.
Why Choose Wood Refinishing?
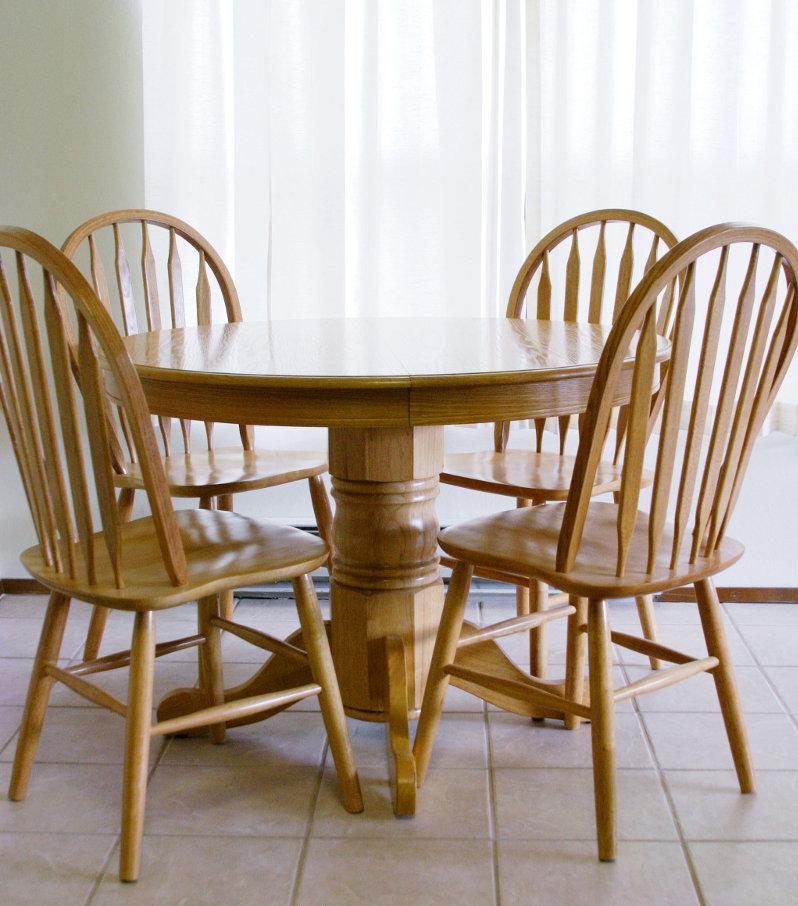
Solid wood furniture offers unparalleled durability and a timeless aesthetic. Unlike particleboard or laminate alternatives, wood furniture can be restored time and time again. This inherent longevity makes refinishing a worthwhile investment, extending the lifespan of your furniture for years to come. Beyond durability, there's the unique character of real wood – the grain patterns, the warm tones, and the solid feel contribute to a sense of quality that's hard to replicate. Refinishing allows you to maintain and enhance these qualities, bringing out the natural beauty of the wood.
Compared to buying new furniture, refinishing is often the more affordable option. New, high-quality wood furniture can be a significant expense. Refinishing, on the other hand, allows you to achieve a similar result at a fraction of the cost. Furthermore, refinishing is an eco-conscious choice. It reduces waste by preventing perfectly good furniture from ending up in landfills. By choosing to restore rather than replace, you're contributing to a more sustainable lifestyle.
Identifying Your Refinishing Needs
Before diving into the world of wood restoration, assess the condition of your furniture. Is it simply faded and scratched, or are there more serious issues like water damage, deep gouges, or loose joints? Identifying the specific problems will help you determine the best course of action.
Surface Scratches and Minor Damage: These are often the easiest to address. A light sanding and a fresh coat of finish may be all that's needed. Water Stains and Rings: These can be more challenging, requiring specialized cleaning solutions and careful sanding techniques. Deep Gouges and Dents: These may require wood filler and careful shaping to restore the surface. Loose Joints: These need to be addressed before refinishing to ensure the furniture's structural integrity. Glue and clamps are typically used to repair loose joints. Damaged Veneer:Veneer repair can be tricky and may require professional assistance.
DIY Furniture Refinishing: A Step-by-Step Guide
If you're feeling ambitious, refinishing wood furniture can be a rewarding DIY project. Here’s a step-by-step guide to help you get started:1. Preparation is Key:
Gather Your Supplies: You'll need sandpaper (various grits), a sanding block or orbital sander, paint stripper (if necessary), wood filler, a putty knife, tack cloth, stain (optional), finish (polyurethane, varnish, lacquer, or wax), brushes or rags, safety glasses, and gloves. Work in a Well-Ventilated Area: Refinishing products can release harmful fumes, so good ventilation is essential. Protect Your Work Surface:Cover your work area with drop cloths to protect it from spills and scratches.
2. Stripping the Old Finish
Apply Paint Stripper (if necessary): If the old finish is thick or heavily damaged, you may need to use a paint stripper. Follow the manufacturer's instructions carefully. Apply the stripper evenly and allow it to sit for the recommended time. Scrape Away the Old Finish: Use a putty knife to gently scrape away the softened finish. Be careful not to gouge the wood. Clean with Mineral Spirits:After removing the old finish, clean the wood with mineral spirits to remove any residue.
3. Sanding the Wood
Start with a Coarse Grit: Begin with a coarser grit sandpaper (e.g., 80-grit) to remove any remaining finish and smooth out imperfections. Work Your Way Up to Finer Grits: Gradually move to finer grits (e.g., 120-grit, 220-grit) to create a smooth, even surface. Sand in the direction of the wood grain. Dust Thoroughly:Use a tack cloth to remove all sanding dust.
4. Repairing Damage (if necessary)
Apply Wood Filler: Use wood filler to fill any gouges, dents, or cracks. Let it Dry Completely: Allow the wood filler to dry completely according to the manufacturer's instructions. Sand Smooth:Sand the filled areas smooth with fine-grit sandpaper.
5. Staining (Optional)
Choose Your Stain: Select a stain color that complements your décor. Consider the type of wood and the desired look. Common stain colors include oak, cherry, walnut, and mahogany. Apply the Stain Evenly: Use a brush or rag to apply the stain evenly, following the grain of the wood. Wipe Off Excess Stain: After a few minutes, wipe off any excess stain with a clean rag. The longer you leave the stain on, the darker the color will be. Let it Dry Completely: Allow the stain to dry completely according to the manufacturer's instructions.
6. Applying the Finish
Choose Your Finish: Select a finish that provides the desired level of protection and sheen. Polyurethane is a durable and water-resistant option, while varnish offers a more traditional look. Lacquer provides a smooth, glossy finish, and wax provides a soft, natural look. Apply the Finish in Thin Coats: Apply the finish in thin, even coats, following the manufacturer's instructions. Let Each Coat Dry Completely: Allow each coat to dry completely before applying the next. Sand Lightly Between Coats: Sand lightly between coats with fine-grit sandpaper to create a smooth surface. Apply Multiple Coats:Apply multiple coats of finish for maximum protection and durability.
Choosing the Right Wood for Your Furniture
The type of wood used in your furniture significantly impacts its appearance, durability, and suitability for different environments.
Oak: A classic choice known for its strength, durability, and distinctive grain pattern. Oak is well-suited for both indoor and outdoor furniture. Cherry: A beautiful hardwood with a rich, reddish-brown color. Cherry is often used for high-end furniture and is best suited for indoor use. Walnut: A dark, elegant hardwood with a smooth grain. Walnut is a popular choice for contemporary furniture and is also best suited for indoor use. Maple: A light-colored hardwood with a fine grain. Maple is a durable and versatile wood that can be used for a variety of furniture styles. Teak: A naturally oily and water-resistant hardwood that is ideal for outdoor furniture. Teak is highly durable and can withstand harsh weather conditions. Acacia: Another durable and water-resistant hardwood that is often used for outdoor furniture. Acacia has a beautiful grain pattern and a warm, golden color. Mango Wood:A sustainable and eco-friendly option. Mango wood has a unique grain pattern and can be stained in a variety of colors.
Common Mistakes to Avoid
Refinishing wood furniture can be a challenging process, and it's easy to make mistakes if you're not careful. Here are some common mistakes to avoid: Not Preparing the Surface Properly: Proper surface preparation is essential for a successful refinishing project. Make sure to remove all of the old finish and sand the wood smooth before applying stain or finish. Using the Wrong Products: Using the wrong products can lead to poor results. Choose products that are specifically designed for wood refinishing. Applying Too Much Stain or Finish: Applying too much stain or finish can result in a blotchy or uneven appearance. Apply thin, even coats and wipe off any excess. Not Allowing Enough Drying Time: Allowing enough drying time is crucial for a durable and long-lasting finish. Follow the manufacturer's instructions carefully. Skipping Safety Precautions:Always wear safety glasses and gloves when working with refinishing products. Work in a well-ventilated area to avoid breathing in harmful fumes.
When to Hire a Professional
While DIY refinishing can be a rewarding experience, there are times when it's best to hire a professional. If you're dealing with antique furniture, valuable pieces, or extensive damage, a professional refinisher can ensure that the job is done correctly and that your furniture is protected.
Professionals have the experience, expertise, and equipment to handle even the most challenging refinishing projects. They can also provide valuable advice on choosing the right products and finishes for your furniture. While professional refinishing can be more expensive than DIY, it's often worth the investment, especially for valuable or sentimental pieces. They can also handle specific types of repairs, such as veneer repair, that require specialized skills and tools. A professional can also help with more complex finishes, like applying a lacquer finish.
Beyond Refinishing: Wood Furniture Care and Maintenance
Proper care and maintenance can extend the life of your wood furniture and keep it looking its best. Here are some tips for wood furniture care: Dust Regularly: Dust your wood furniture regularly with a soft cloth to prevent the buildup of dirt and grime. Clean Spills Immediately: Clean up spills immediately with a damp cloth to prevent staining. Use Coasters and Placemats: Use coasters and placemats to protect your furniture from scratches and water rings. Avoid Direct Sunlight: Avoid placing your furniture in direct sunlight, as this can cause fading and damage. Use Furniture Polish Sparingly: Use furniture polish sparingly, as it can build up over time and make your furniture look dull. Protect Outdoor Furniture: Protect outdoor furniture from the elements by covering it during inclement weather. Regularly Inspect Your Furniture:Regularly inspect your furniture for signs of damage, such as loose joints or cracks. Addressing these issues promptly can prevent further damage.
By understanding the benefits of solid wood, mastering essential refinishing techniques, and following proper care guidelines, you can ensure your furniture remains a beautiful and functional part of your home for generations. Whether you choose the DIY route or enlist professional help, restoring your wood furniture is a rewarding investment in its longevity and aesthetic appeal.